The best crutch alternative just got better! The iWALKFree was designed to be easy to assemble with no tools needed. Just follow the simple step-by-step (pun intended) instructions below, or visit our instructional video here
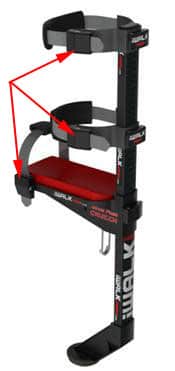
There are three primary component parts assemblies in your iWALKFree.
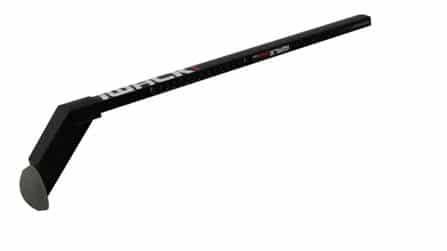
Beam – A sturdy alloy main beam with integral foot / tread assembly permanently installed (Figure 1-1).
There are three different sizes of the iWALKFree, but the only thing that varies between the sizes is the length of the beam. To figure out which size will work best for you, visit our size chart or give us a call.
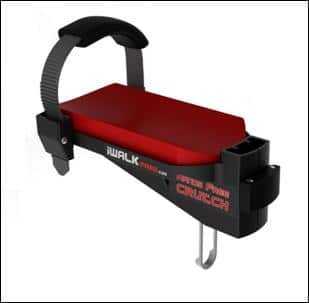
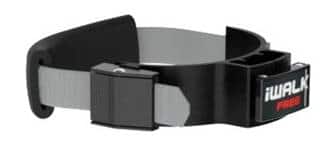
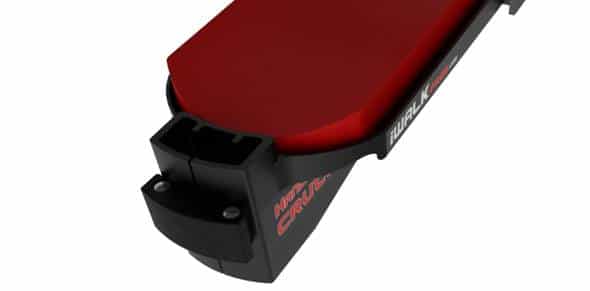
Knee platform assembly – Includes knee platform, high density pad, spring loaded double retention pin, platform strap (which wraps around your calf or cast) and ratcheting adjustment buckle.
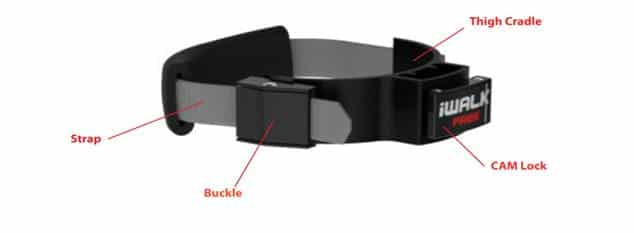
Thigh strap assemblies (also called “leg strap assemblies”)– Two thigh strap assemblies (upper and lower) include thigh cradles, adjustment straps and ratcheting adjustment buckle. Note that the front “cradle” portion of the upper thigh strap assembly is stiffer than the lower cradle section.
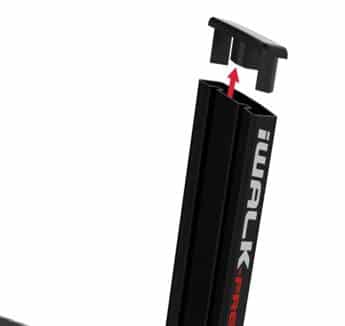
Remove the plastic cap from the top of the beam
(figure 2-1). If it will not pull off by hand, gently pry it up with a screwdriver or butter knife until you can grasp it and pull it free.
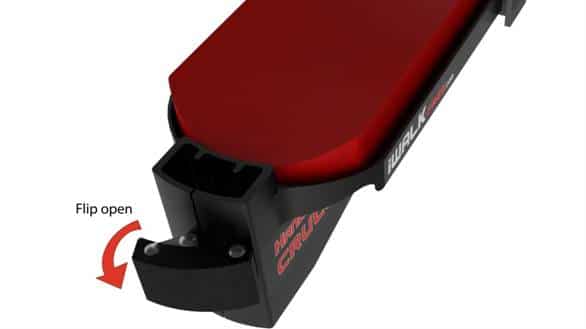
View the underside of the knee platform to see the function of the locking pins (Figure 2-2). Note the plastic pull tab connected to the spring loaded U shaped double locking pin. Pull back on the tab and note that the locking pins retract. Release the pull tab and the locking pins return to their engaged (assembled) position.
Put the cam lock (located on the front of the knee platform), into the open position(Figure 2-3).
Note – both thigh straps have similar cam locks that function identically to the cam lock found on the knee platform.
Pulling back on the pull tab (to retract the locking pins), slide the knee platform onto the beam. Slide it down the beam until one hole (located on the back side of the beam) appear above the top of the knee platform (See figure 2-5). Release the pull tab and gently slide the knee platform up or down on the beam until the locking pins engage with an audible “thunk”. HINT – forcibly holding the cam lock in the open position makes it easier to slide the platform up or down on the beam.
Once in place, make certain to put the cam lock into the closed position.

NOTE – never use your iWALKFree without the locking pins fully engaged in the beam AND the cam lock fully closed!
Don’t worry about the height of the knee platform right now – this will be covered in the Fitting section.
Each leg strap assembly consists of three components – the thigh cradle, the ratchet buckle and ratchet strap (with high density comfort padding) See figure 3-1 .
 IMPORTANT – to enhance stability, the “thigh cradle” portion of the upper thigh strap assembly (the part that is in contact with the front of your thigh) is stiffer than the thigh cradle of the lower one. Newer models have the words “UPPER” and “LOWER” clearly displayed on the face of the cradle. For older models, the upper thigh strap assembly can be identified in two ways. First, the ratchet strap on the upper assembly is longer than the lower one. Second, you can manually flex the thigh cradle section of the thigh strap assemblies and feel that the upper one is noticeably stiffer than the lower one.
Starting with the lower thigh strap assembly, put the cam lock into the open position and then slide the assembly onto the beam. (See Figure 3-2)
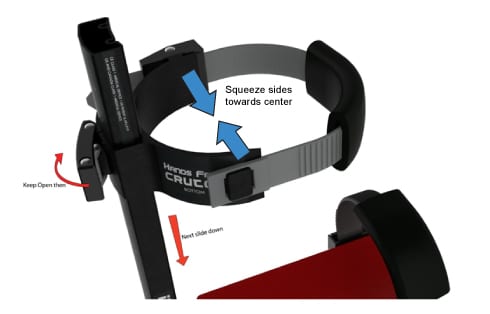 Hint – position the assembly so that the ratchet buckle will be located on the outside of your injured leg. (See Configuring iWALKFree for right or left leg section if needed)
If it doesn’t slide easily, try manually squeezing the two sides of the thigh cradle inwards (each end toward the other) while sliding the assembly down the beam (figure 3-2). Position the lower thigh strap assembly approximately six inches (15 cm) above the knee platform.Install the upper thigh strap assembly in the same manner, positioning it near the top of the beam. Close the cam locks.Don’t worry about exact height positions at this point.
Replace the beam cap into the top of the beam. Assembly is finished!
 iWALKFree can quickly and easily be configured to be worn on the left or right leg. The only difference is where the buckles for the leg and platform straps are located. You will want to position the buckles on the outside of your injured leg. Don’t worry; you can quickly configure your iWALKFree in seconds without the need for tools.
First, reposition the thigh straps. Remove the cap from the top of the beam and simply slide the thigh strap assemblies off of the beam. flip them over, and reinstall (as described in more detail in the preceding section 3). Remember that the stiffer thigh saddle goes on top. The buckles should now be on the opposite side of the beam.
Next, reposition the platform strap assembly as follows:
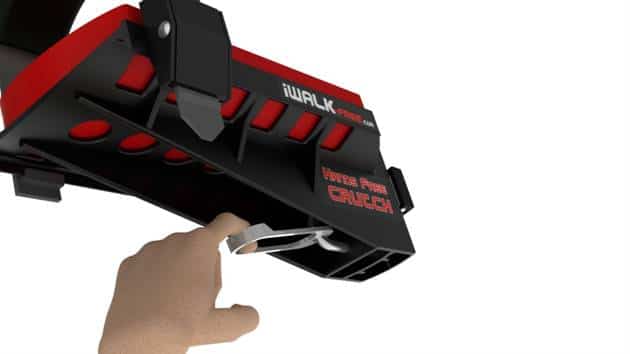
Step 1. Disengage the adjustment strap from the buckle by pressing on the buckle latch and pulling the ratchet strap clear.
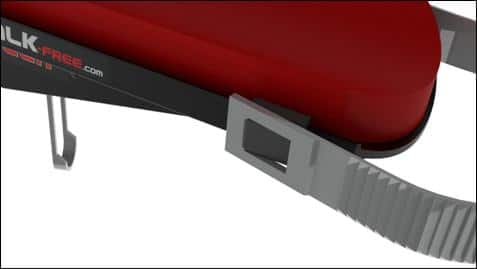
Step 2. Using firm pressure, slide the buckle off of the rail of the knee platform. (See Figure 4-2)
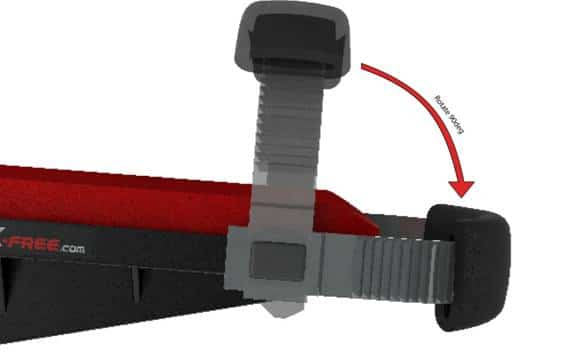
Step 3. Remove the adjustment strap from the knee platform by rotating the strap 90 degrees from its normal position. (See Figure 4-3.1) and prying it off the slider (See Figure 4-3.2).
Step 4. Reinstall the adjustment strap onto the opposite side of the knee platform (there are sliders on both sides). Begin installation with the strap rotated 90 degrees from its normal position, as in Figures 4-3.1 and 4-3.2. If the strap doesn’t easily engage the rectangular mount on the slider, a gentle push should do the trick. Rotate the strap 90 degrees into its normal position to lock it onto the slider.
Step 5. Slide the ratchet buckle onto the side rail of the knee platform, making sure that it will be positioned on the outside of the injured leg.
Older models may have shipped with only one slider – in this case, using a small hammer or mallet, tap the slider off of the side rail of the Knee platform and reinstall onto the other side.